25/11/2007
- Oh its gluing the rudder time...not looking forward to this.
But
before Bob and I commenced with the gluing I drilled the holes out
to 7/64" where I could not get a bucking bar or the longeron yolk
in to squeeze. Then installed the pop rivets that the plans
say you can use as an alternative. Had to do this in a
couple of places in the rudder basically the last rivet by the
horn as shown in the picture and the last rivet towards the
trailing edge as it gets very narrow there.
Two
major decisions were made for the 'gluing'; we would mix the
sealer separately not in the tube it came in as we would not need
that much and it would mean application to the wedge to be a lot
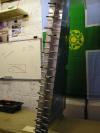
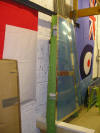
easier. The second decision was to trap the rudder between
two angles of aluminium as the pictures show. Later on the
result shows a dead straight rudder and bang in the
middle...pleased with the result. What ever method you use
here its worth spending a bit of money on some material that will
do the job...nuff said. Now its just has to be left to dry
!!


Vertical Stabiliser
With
Bob available for help it was time to patch up some of the primer
where I had pulled it off with tape when riveting the fin. I
borrowed next doors air brush kit he uses for model making and
yesterday I bought some new parts for it to go connect to the
compressor. We then sprayed the inside of the forward spar
in the fin. It was then a virtually simple job of riveting
on the aft spar using the pneumatic squeezer.


